Table of Contents
ToggleIntroduction to Lanyard Keychains and Their Practicality;
Lanyard keychains have become a popular accessory in recent years, not only for their functionality but also for their fashion statement. They are a simple, yet practical way to keep your keys organised and easily accessible. In this section, we will dive into the basic features of lanyard keychains and explore why they are a must-have item.
One of the main advantages of using a lanyard keychain is its convenience. With one simple accessory, you can keep all your important keys in one place without having to rummage through your bag or pockets every time you need them. This is especially useful when you have multiple sets of keys for different purposes such as work, home, car, etc. You can even attach other small objects like USB drives or mini flashlights to make them easily accessible.
Another practical feature of lanyard keychains is their durability. Most lanyards are made from sturdy materials such as nylon or polyester which makes them long-lasting and resistant to wear and tear. This means that once you invest in a good quality lanyard keychain, it can last you for years without needing replacement.
Lanyard keychains are not just another trendy accessory, they offer practicality, durability, versatility, and even branding opportunities. In the next section, we will guide you on how to make your customised lanyard keychain in just a few simple steps. So let’s get started!
Materials needed for making a customised lanyard keychain;
When it comes to making a customised lanyard keychain, the materials you will need are fairly simple and easy to find. Most of these items can be found at your local craft store or online, making it convenient for anyone looking to try this DIY project.
- Lanyard Material: The first and most important material you’ll need is the lanyard itself. This is the base of your keychain and can come in a variety of colours, patterns, and widths. Nylon or polyester lanyards are recommended as they are durable and hold up well against wear and tear.
- Keyring: A keyring is what holds all your keys together on your keychain. You can choose from different sizes and styles depending on your preference. It’s best to use metal keyrings as they are stronger and less likely to break.
- Scissors: To cut the lanyard material, you’ll need a good pair of scissors that can easily cut through the fabric without fraying the edges.
- Tape Measure or Ruler: While not necessary, having a tape measure or ruler can help ensure that your lanyard is the desired length before cutting it.
- Fabric Glue: Fabric glue will be used to secure any loose ends when creating a braided or woven design with multiple strands of lanyard material.
- Pliers: If you plan on using beads with small holes or adding jump rings onto charms, pliers will come in handy for opening them up and attaching them securely onto the keyring.
These are the basic materials needed to make a customised lanyard keychain but feel free to get creative and add any other embellishments or decorations that you desire. With these supplies in hand, you’ll be ready to start making your own unique and personalised keychains in no time!
Step-by-step instructions on how to make a custom lanyard keychain?
Making your customised lanyard keychain is a fun and easy DIY project that can add a personal touch to your everyday items. With just a few materials and some simple steps, you can create a unique and personalised keychain that reflects your style and personality. In this section, we will provide you with step-by-step instructions on how to make your very own custom lanyard keychain.
Step 1: Gather Your Materials
Before starting the project, ensure that you have all the necessary materials ready. For this DIY project, you will need:
– A length of paracord or nylon cord (about 2 feet long)
– Keyring or split ring
– Scissors
– Lighter (or matches)
– Optional: beads, charms, or other decorative elements
Step 2: Choose Your Design
Decide on the design of your lanyard keychain. You can go for a simple single-colour design or get creative with different colours and patterns. You can also add decorative elements like beads or charms to make it more unique.
Step 3: Start Knitting
Take the length of the cord and fold it in half to find the middle point. This will be where you attach the keyring. Place the folded end through the ring and pull it tight until there is about an inch of loop at the other end.
Next, take one side of the cord and place it over both strands in front of the loop. Then take another piece from under both strands behind the loop. Pull these two pieces tight to form a knot.
Step 4: Add Beads or Charms (Optional)
If you want to add beads or charms to your lanyard keychain, now is the time to do so before continuing with knotting techniques. Simply slide them onto one side of the cord before forming a knot. You can add them intermittently throughout the keychain or at the end for a decorative touch.
5: Switch Colours (Optional)
If you want to incorporate multiple colours in your lanyard keychain, simply switch to another colour by taking one of the strands from the first colour and placing it over both strands of the second colour. Then continue with knotting as usual.
Step 6: Finishing Touches
Once you have reached your desired length, finish off your lanyard keychain by tying a knot at the bottom and trimming any excess cord. Use a lighter or matches to melt the ends of the cord slightly to prevent fraying.
Tips and tricks for personalising your design;
Personalising your lanyard keychain can be a fun and rewarding experience. Not only does it allow you to create a unique accessory, but it also allows you to showcase your creativity and personal style. To help you make the most out of this DIY project, here are some tips and tricks for personalising your design:
- Choose the right materials: Before starting your project, it’s important to choose the right materials for your lanyard keychain. This includes the type of cord or ribbon, as well as any additional embellishments such as beads or charms. Consider what colours and textures will best reflect your personality and complement your overall design.
- Use letter beads: One way to add a personal touch to your lanyard keychain is by using letter beads to spell out a name or meaningful word. These can easily be found at craft stores or online, and come in various sizes, fonts, and colours. You can also mix and match different types of beads for a more eclectic look.
- Incorporate photos: Another great way to personalise your lanyard keychain is by incorporating photos into the design. You can print out small pictures of loved ones or special memories onto photo paper and then use adhesive glue or clear tape to attach them to the lanyard.
- Experiment with different knotting techniques: There are many different knotting techniques that you can use when making a lanyard keychain which can add interest and texture to your design. Some popular options include square knots, spiral knots, or braiding techniques like fishtail or cobra stitch.
- Add decorative elements: Don’t be afraid to get creative with additional decorative elements such as buttons, ribbons, tassels, feathers, or even small trinkets like miniature figurines or shells. These can all add extra character and uniqueness to your personalised keychain.
- Consider the functionality: While personalization is important, it’s also crucial to consider the functionality of your lanyard keychain. Make sure that it can comfortably fit around your neck or wrist and that it has a sturdy attachment for holding keys.
By following these tips and tricks, you can create a truly one-of-a-kind lanyard keychain that reflects your individuality and style. Have fun experimenting with different designs and techniques, and don’t be afraid to let your creativity run wild!
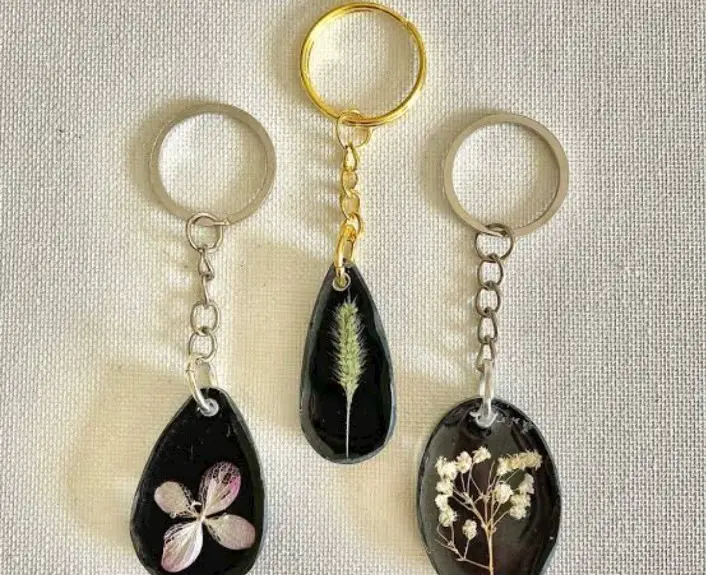
Creative ideas for using different types of materials (beads, fabric, etc.);
There are endless possibilities when it comes to creating your customised lanyard keychain. One way to make it unique and personalised is by using different types of materials such as beads, fabric, or even unconventional items like paper clips or bottle caps. In this section, we will explore some creative ideas for incorporating these materials into your DIY lanyard project.
Beads are a popular choice for adding colour and texture to a lanyard keychain. They come in various sizes, shapes, and colours, making them versatile for any design. You can use basic plastic or glass beads for a simple yet eye-catching look, or opt for more intricate and decorative options like seed beads or gemstones.
One idea is to create a beaded pattern on the lanyard using different coloured beads. You can either string them onto the lanyard cord itself or attach them with jump rings at intervals along the length of the lanyard. This will add visual interest and make your keychain truly one-of-a-kind. Another creative idea is to use fabric scraps to make a braided or woven lanyard. This technique involves cutting thin strips of fabric and braiding or weaving them together with the lanyard cord. Not only does this add an interesting texture to your keychain, but it also allows you to incorporate different patterns and colours from your favourite fabrics.
For example, you can bend paper clips into different shapes and thread them onto the lanyard cord for a modern twist on traditional beadwork. As for bottle caps, you can paint them in vibrant colours and glue them onto the lanyard as embellishments or even use them as the base for a miniature collage.
Conclusion and Final Thoughts on the DIY Project:
Making your customised lanyard keychain is a fun and easy DIY project that allows you to express your creativity while also being practical. It can be a great way to add a personal touch to your everyday items or even make thoughtful gifts for friends and family.
Throughout this article, we have discussed the materials needed, step-by-step instructions, and tips for creating a unique lanyard keychain. We have also highlighted the importance of safety precautions when using sharp tools such as scissors or hot glue guns.
One of the best things about this project is its versatility. You can customise your lanyard keychain in endless ways by using different colours, patterns, charms, and beads. This allows you to create something that truly reflects your personality or matches your style.
Moreover, this DIY project is suitable for all ages and skill levels. Whether you are an experienced crafter or just starting with DIY projects, making a lanyard keychain is something anyone can do with ease. It is also a great activity for kids to develop their motor skills and unleash their creativity.
This project allows for endless possibilities and room for experimentation. Don’t be afraid to try new techniques or mix different materials – who knows what kind of unique designs you might come up with!